I shared a picture of my tzitziyot on facebook yesterday. Here’s the pic.
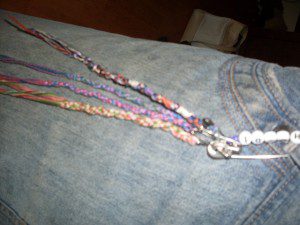
This method has worked really well for me for a long time. I can pin all four tassels on at one time. But a lovely lady (thank you, Anne) asked if the Hebrew would indicate that they should be in four different spots. I checked the Hebrew and I’d like to share the transliteration and the exact translation here. This is Deut. 22:12.
Hebrew: Ghedeel awsaw lech al arba kawnawf kesooth asher kawsaw
English: Twisting thread make above, over, upon four edge, wing, flap, corner cover with clothe, conceal, cover
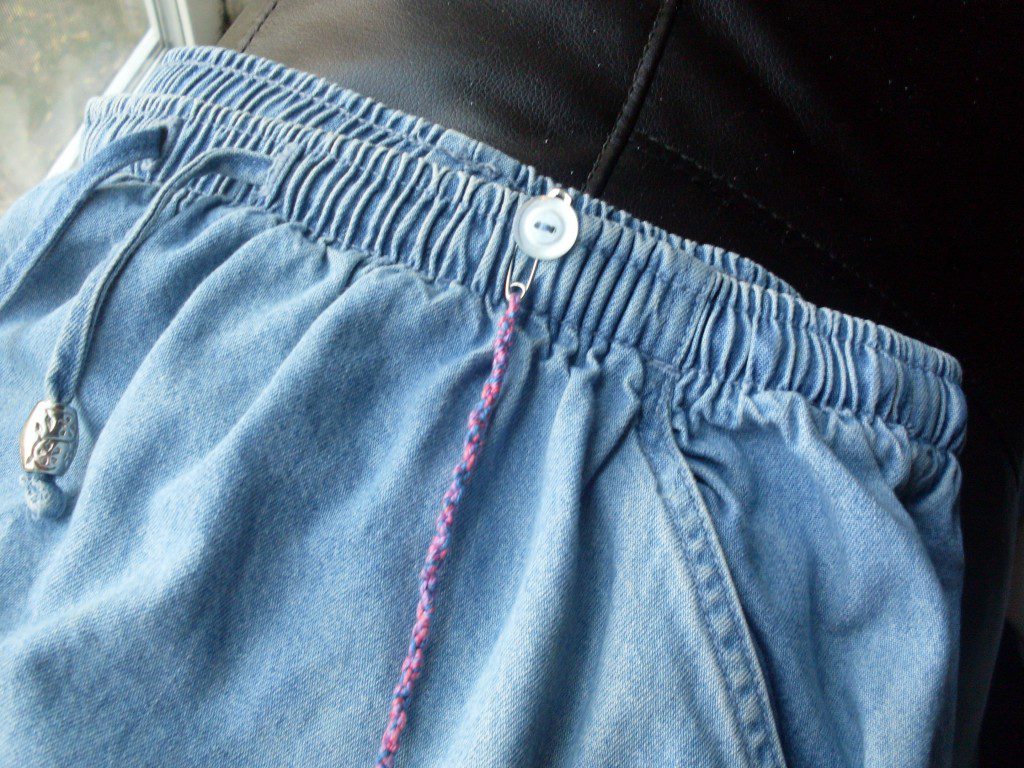
The Hebrew gets right to the point and drops all the extra words we find in the English lol. When I hooked my tassels all on a safety pin, I was focusing on the word four and making sure they all had a blue cord. But when looking at the Hebrew, that number four could refer to tassels or locations where they are attached. So I’m going to spread out my tassels. 🙂 But I don’t spend much time getting ready for the day in the morning. I don’t wear makeup. I wear flexiclips that take literally a minute to put my hair up, and I slip my clothes on and go. I want to make sure that my tassels are easy to put on so I will actually put them on every day. The importance of this command is actually obeying it. I can talk about tassels and look at the Hebrew, but until they are actually on my clothes, I’m not obeying. These tassels have been an incredibly powerful tool in my life. I fiddle with them throughout the day. I see them hanging there. I’m reminded, not only to obey the Torah, but that I belong to the God of Israel. I entered into a covenant with Him when I chose to accept Yeshua the Messiah and obey His commands. Having this constant reminder has an incredible impact on my thought processes and my actions, if I’m paying attention. So I just want to emphasize that the most important thing here is to get those tassels on your clothes. I want to do my best to obey, so I’ve come up with a simple nice looking way to attach tassels to a skirt in four different places. (The pic only shows one. I’m still sewing.) Are you ready?
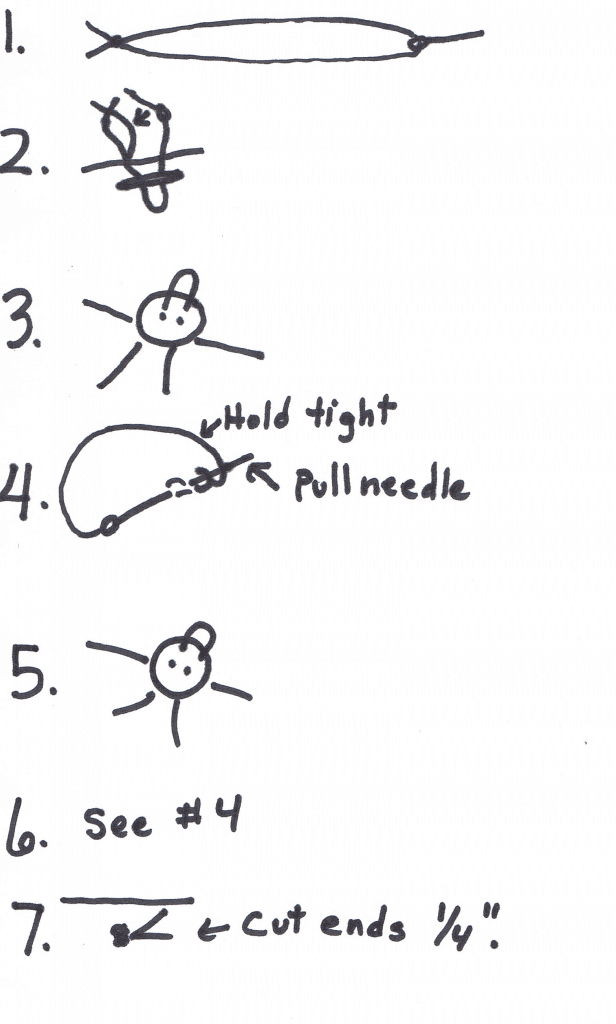
This method is so simple, I don’t know why I didn’t think of it before. 🙂 I sewed a button on my skirt right at the waistband. Then I took my tassel, which was knotted right onto a safety pin, and pinned it over the button. I pulled down a bit on the pin and it “locked” in place. Attaching the safety pin to the button will put a lot less stress on the fabric of my skirt then the pin would. The tassel can also be removed for laundering, and I only have to have four tassels that I move from skirt to skirt. Of course, I could have more, if I wanted to. 🙂 For some of you, this will be a very easy task. But I know that some of you may feel a bit overwhelmed at the idea of sewing on a button, so I’m going to share my very sturdy way of sewing on a button. This is how I sew buttons on my husband’s shirts. I drew some illustrations to help you. This button is 1/2 inch. Any bigger, and you might have trouble pinning the safety pin around it.
1. Thread your needle double stranded. Almost every sewing task is better if the thread is doubled. Make a good sturdy knot at the end.
2. Bring your needle up through the fabric from the back at the point where you want your button. Don’t pull the knot tight against the fabric just yet. Pull your needle up through one hole of the button and down through the other. Then push your needle back down through the fabric a bit away from where you brought it up. On the back of your fabric, you should have your needle, and you should have a loop of thread ending in your knot. Run your needle through the loop of thread and pull everything tight.
3. Push your needle up through your skirt, into one hole of the button, down the other hole, to the back of the fabric. Do this about 4 times.
4. Make a knot on the back of your fabric in the following way. Push your needle through a small bit of fabric on the back of the button, but don’t push it all the way through. Wrap your thread around the tip of the needle twice. Hold the thread taut, then pull the needle all the way through. This will give you a knot that incorporates the fabric.
5. Run your needle up and down through the button about three more times.
6. Make two more knots as in step 4.
7. Cut your thread about 1/4 inch from your last knot.
This way of sewing on a button will help the button stay on longer. If the two knots come out, 3 times through the button will have to unravel, then it hits another knot. Then it would have to unravel 4 more times, and then hit another knot. By then, you would hopefully notice and can repair it before losing the button. 🙂
 I hope this idea and short tutorial was helpful to you. How do you wear your tassels?






4 Responses
Thank you, thank you, thank you! This is an awesome tutorial! (How DID you know how bad I am at sewing?!?! But this will help…)
I was blessed to be raised by an amazing seamstress, but I know many did not have that advantage. If you need any help at all, don’t hesitate to ask. 🙂 I hope this idea works well for you.
I too had to study this out further recently. I love your idea —but not sure I would get all the buttons sewn on. A lot of my pants and skirts don’t have good place to pin on my tassels so I actually made a belt from a thick piece of elastic (it was actually the old waist band from some pull on pants). I then sewed my tassles on corners of the belt and I can just easily pull it on and off each day!! Much easier!! I like to recite Psalm 119:34 Give me understanding, that I may keep your law and observe it with my whole heart.
I got this idea from The Cuppa Shebrews on Hebrew Nation Radio and am so thankful!
Love it when women share things like this! Thanks Heidi!
Great idea on the belt! Thank you for sharing the verse, it is so important to be mindful of what we are doing, or it simply becomes vain repetitions. Shabbat Shalom to you!